If you are done with everything the first thing I'd like you to do is add a widget to your blog. The steps to do so are listed below. After adding the widget, you have several choices: you can work in Logo (I'll give you a handout), you can work in Alice using this tutorial , or you can work on the practice websites (your speedskin must be on your keyboard!).
Here are the steps to adding a widget to your blog:
- Click on the "Design" button in the top right hand corner of your blog.
- You should have several areas where you can click on "Add a Gadget" (see picture below). You'll want to click on the "Add a Gadget" link where you want your Gadget to be added on your blog :
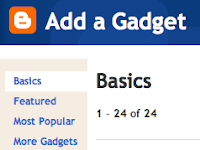
- After clicking on the Gadget (many people usually call these Widgets, but we'll stick with Blogger's name), you'll get a window that pops up that looks like the following picture:
- Choose the Gadget you want to include on your blog by doing a simple search. Click on one of the four choices on the left - Basics, Featured, Most Popular, or More Gadgets - then click on the blue plus sign to add it. Or, in the top right-hand corner of the window there is a search box - search for something that you want to add. REMEMBER!!!! - everything added to your blog must be school appropriate!


No comments:
Post a Comment